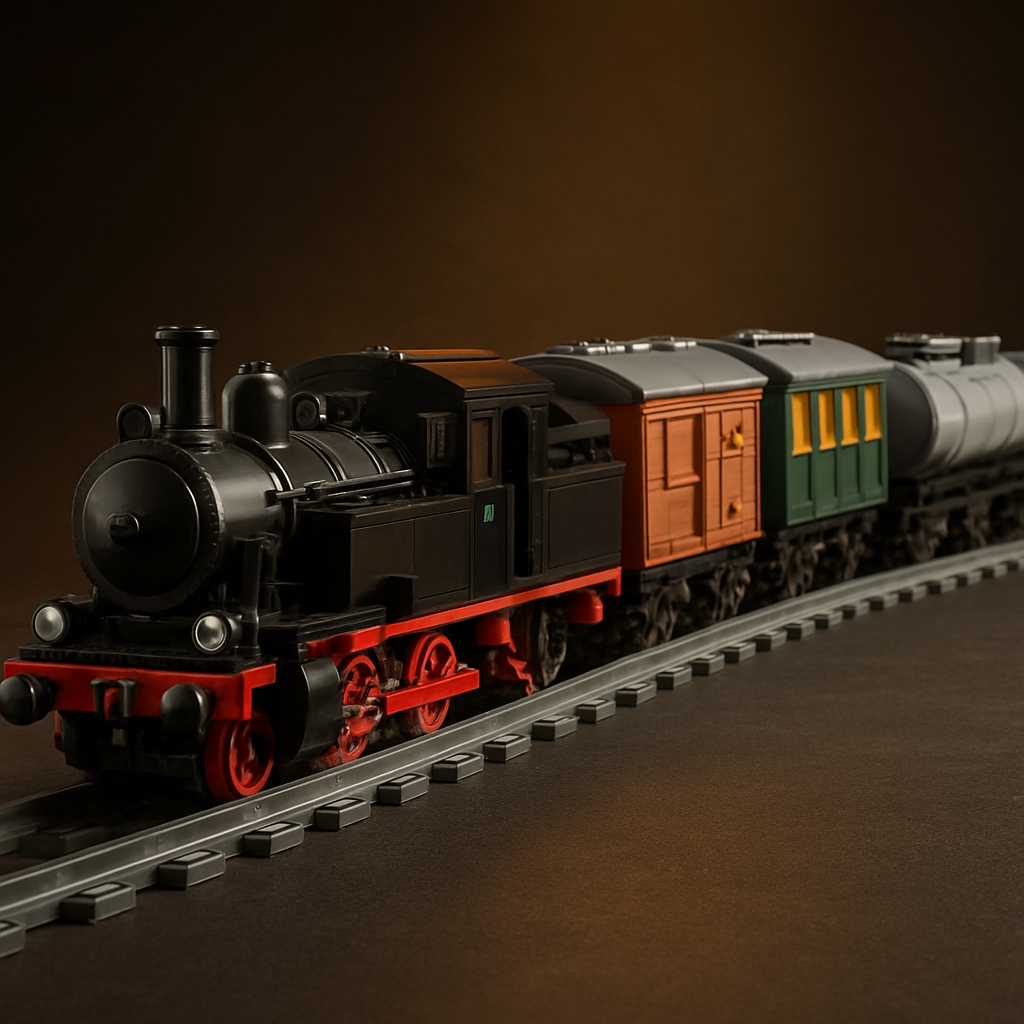
Whether you are a hobbyist, a parent, a gift buyer, or a MOC fan, brick train cars reward planning and patience. They are modular, scalable, and collectible. A finished consist looks impressive lined up on a display rail. Best of all, with quality third-party moc building blocks, you can design any locomotive, boxcar, tanker, or passenger coach you imagine — no official license needed.
Why Brick Train Cars Are Worth Building
Train cars hit a sweet spot. They are modular, scalable, and collectible. For families they teach measurement, balance, and sequencing. For adult builders they are a relaxing way to apply real engineering ideas. Custom brick train cars also stand out at clubs and shows because no two builders solve the same problem the same way.
Build one car this weekend and a matching one next month. Expand your consist at any pace.
Beginners and experts can work on the same layout. Every skill level has a role.
A finished consist lined up on display rail looks impressive and invites new additions.
Step 1: Plan Your Build Before You Snap Bricks
The biggest mistake new builders make is grabbing parts first and planning later. A short planning phase saves hours of rework.
Pick a Purpose
Prioritize detail, accurate proportions, and color. Weight and durability matter less.
Prioritize sturdy connections, smooth wheels, and a body that survives drops.
Prioritize correct wheel spacing, low friction, and clearance on curves.
Match the group's scale, coupler type, and track gauge from the start.
Choose a Scale
| Scale | Width | Best for |
|---|---|---|
| 6-wide | 6 studs | Tight curves, lighter models, faster builds |
| 8-wide | 8 studs | Interior detail, realistic proportions, display |
Tip: Find a photo of a real train car you like. Note its roof shape, window count, door style, and proportions. A reference photo turns a vague idea into a clear target.
Step 2: Gather the Right MOC Building Blocks
Custom builds rely on a deep mix of plates, bricks, slopes, and specialty parts you will not find in a single boxed set. Moc building blocks let you assemble any combination from a single reliable source.
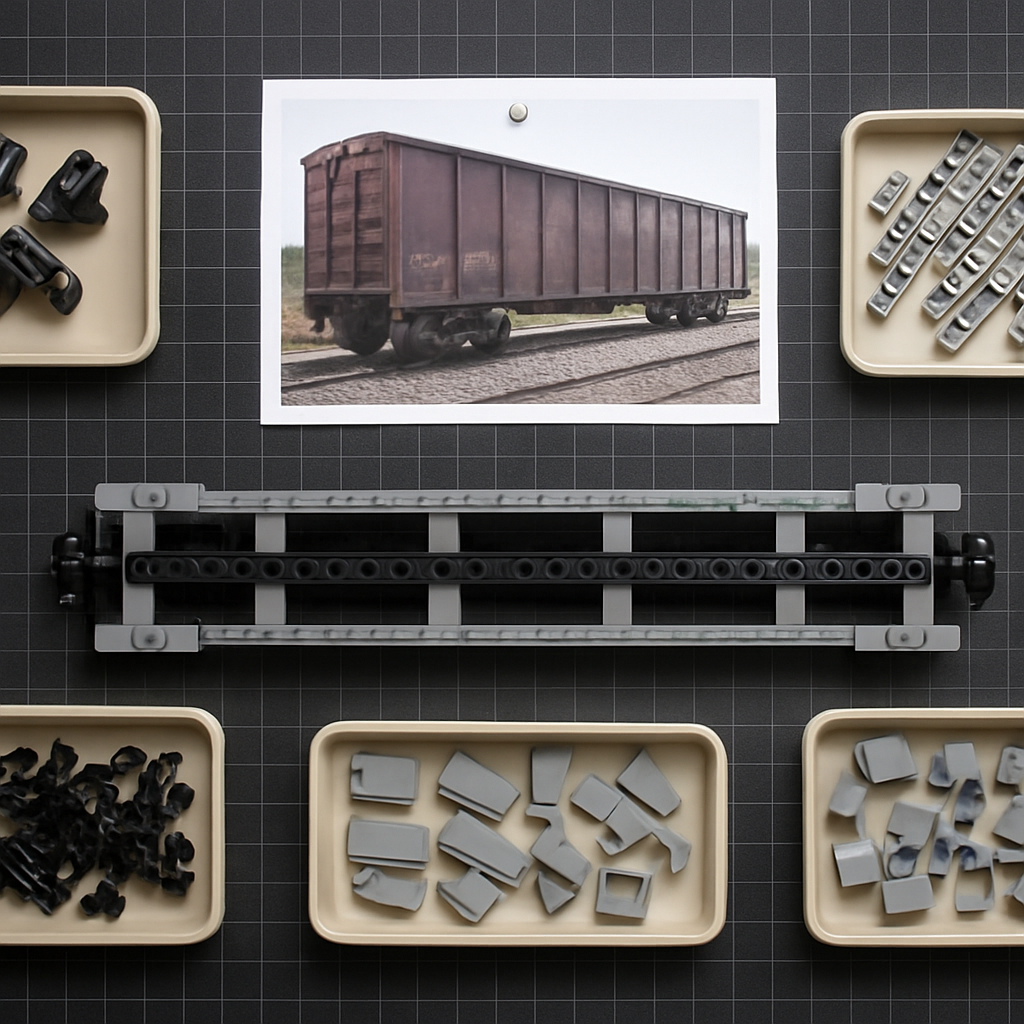
Core Parts You Will Need
Body and frame. Use plates for the chassis base and bricks for the body walls.
Sized to your track. Match wheel spacing to your chosen gauge before buying.
Magnetic or clip-style. Pick one standard and use it across every car in your consist.
Roofs and noses. Build a removable roof section so you can access the interior.
A center spine prevents sagging on long boxcars and passenger coaches.
Realistic details. Add grab rails, handbrake wheels, and tile floors for character.
Quality matters most for moving parts. Loose bricks ruin a train. Look for tight clutch power and consistent molding. High-grade ABS plastic holds its grip after many rebuilds. Browse a wide selection of lego alternative bricks and compatible parts to find the right pieces for your build.
Step 3: Build a Strong Chassis First
The chassis is the foundation. Build it once, build it right, and every car after becomes easier.
Place wheel sets so the car rolls straight and clears curves. Test on actual track. Lock axle assemblies into a plate frame so they cannot shift.
Run a Technic beam or a double layer of plates down the center spine. This single step prevents the most common structural failure in long cars.
Mount couplers at a consistent height across every car. Measure from the rail up and match every car to that number. Consistency is what makes a full train run smoothly.
Step 4: Customize the Body for Looks and Function
This is where custom brick train cars stop looking like generic boxes and start looking like the real thing.
Use slopes for a curved passenger roof, or flat plates with raised edges for freight. Build the roof as a removable section to show off an interior.
Pick a two- or three-color scheme and repeat it across the consist. Add stripes with thin plates or tiles. Build simple lettering from small parts for road names.
Ladders and grab rails on the ends. Handbrake wheels and vents on the roof. Tile floors and bench seats inside coaches. Printed gauges in the cab.
Opening boxcar doors, a tilting hopper, working lights. For motorized builds, plan the battery box and wiring path before you build the body. Learn more in our guide to lego alternative motors.
Step 5: Test, Adjust, and Reinforce
A finished car is not finished until it runs and survives handling.
Step 6: Run a Building Blocks Team MOC
A coordinated building blocks team moc lets a club, classroom, or family produce a full train that no single person could finish alone. The key is agreeing on shared standards before anyone starts.
| Scale | 6-wide or 8-wide — decided up front, no exceptions mid-project. |
| Coupler type and height | One standard for the whole group. Measure from rail to coupler center. |
| Color palette | Shared livery so cars look like one railroad, not a random collection. |
| Track gauge | Everyone builds for the same rails. Test cars on a shared test loop. |
Assign each builder a car or section. Beginners take flatcars; experienced builders handle the locomotive.
Bring cars together and run them as one consist. Review fit, color match, and coupling before declaring it done.
A well-run team build teaches planning, communication, and compromise alongside the craft itself.
Expert Tips for Better Brick Trains
Make the chassis, body, and roof as separate modules, then combine. Repairs and upgrades get far easier.
A smooth tiled interior floor lets you slide minifigures and cargo without snagging on studs.
Whatever you add to one side, add to the other. Symmetry reads as professional instantly.
Customizing means swapping. Keep extra slopes, plates, and wheels close so adjustments stay quick.
If a design works, you will want to recreate it. Photos are your free instructions.
Common Mistakes to Avoid
| Mistake | Fix |
|---|---|
| Skipping the plan | Plan first. Decide purpose, scale, and reference photo before touching parts. |
| Mixing scales | Lock to one scale at the start. A 6-wide next to an 8-wide looks wrong. |
| Weak center spine | Run a Technic beam down the center. Long cars sag without reinforcement. |
| Inconsistent coupler height | This is the number-one cause of trains uncoupling mid-run. Measure every car. |
| Detail before structure | Get it rolling and solid first. Add surface details after the chassis passes the roll test. |
| Cheap, loose bricks | Poor clutch power undoes everything. Use high-grade ABS parts throughout. |
Ready to Start Your Custom Train Build?
Your next step is simple: sketch one car this week, gather your parts, and build the chassis. Once you have a rolling foundation, the rest comes quickly. Browse our full range of MOC Building Guide articles or start shopping compatible bricks and accessories now.