Titanic 10294 Creator Expert: Engineering Breakdown, Display Setup, and LED Upgrade Guide
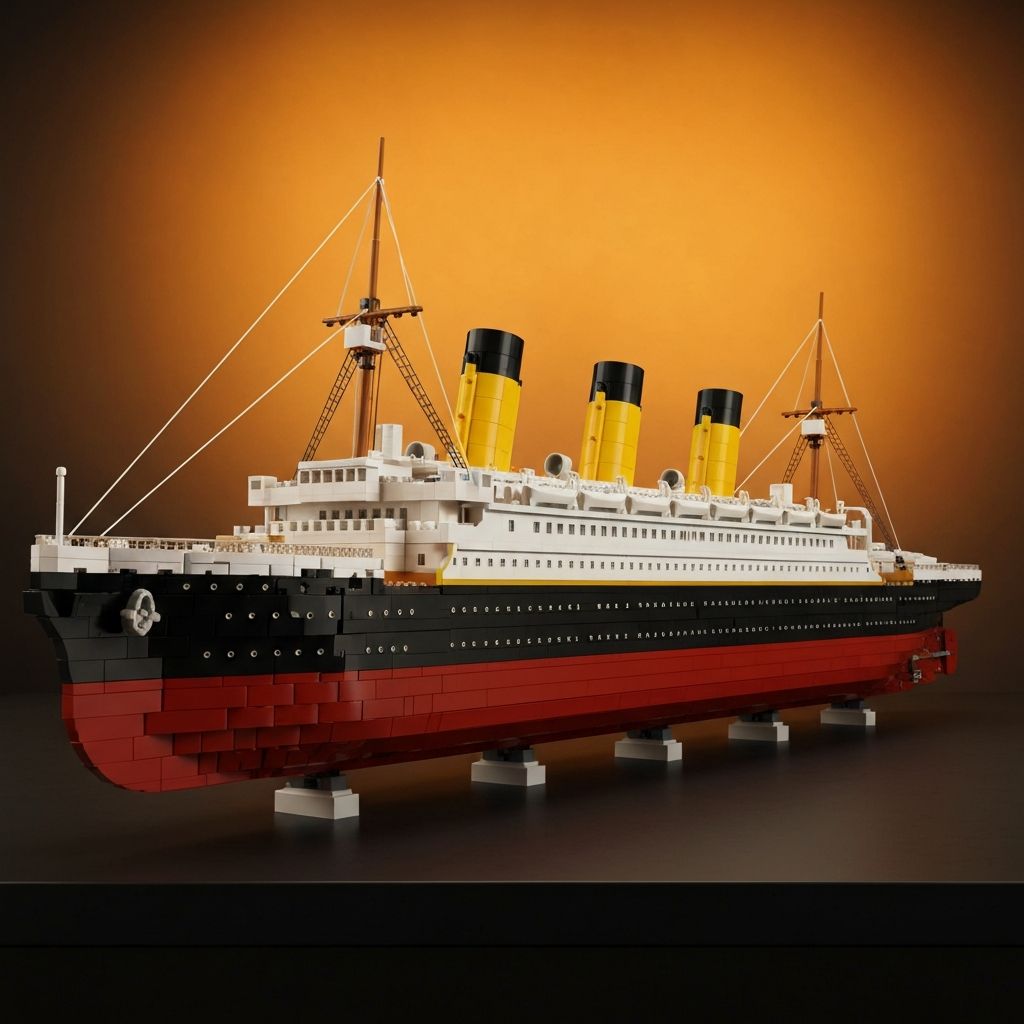
The Titanic 10294 Creator Expert is the largest building block set ever produced — 9,090 pieces, 135cm of hull, three modular cross-section interiors, and authentic Harland and Wolff engineering accuracy. This guide covers workspace preparation, structural assembly sequence, module separation, rigging technique, display cradle setup, and aftermarket LED integration.
Engineering and Architecture
The Titanic 10294 is an engineering-first build. The hull does not begin with the exterior plating — it begins with an internal Technic frame. Lay the keel. Frame the transverse bulkheads. Plate the hull panels. Install the triple-expansion steam engines. Build the superstructure deck by deck. Tension the mast rigging last.
The three instruction volumes divide the 9,090 pieces into logical build stages mapped to the three modular hull sections. Each volume is self-contained. Complete Volume 1 to a functional, displayable module before opening Volume 2.
Keel and Bulkheads
Lay the Technic keel beam. Frame all transverse bulkheads at correct spacing. This defines the hull geometry for all subsequent plating.
Hull Plating
Apply exterior black and white ABS hull panels. The curved bow sections use SNOT orientations. Check alignment against the instruction diagrams at each tier.
Engine and Boiler Rooms
Install triple-expansion piston engine assemblies and boiler furnace arrays. Connect the propeller shaft linkage. Verify rotation before closing the hull floor.
Superstructure Decks
Build each deck level independently. Promenade deck windows, boat deck railings, and bridge navigating instruments each require precise stud-level alignment.
Funnels and Rigging
Seat all four funnels. Attach the dual masts at correct rake angles. Tie the tension cord rigging last — the lines provide actual structural support to the mast elements.
Display Cradle Assembly
Lock six cradle supports beneath the lower hull. Attach the nameplate plaque. Route any LED micro-wires beneath the cradle channels before finalizing the stand.
Module Separation and Cross-Section Interiors
The completed model divides into three sections. Unclip the dual-axle Technic pin locks between sections. Pull apart cleanly. Each section retains full structural integrity — no sagging, no brick loss. The locking system realigns precisely on reassembly.
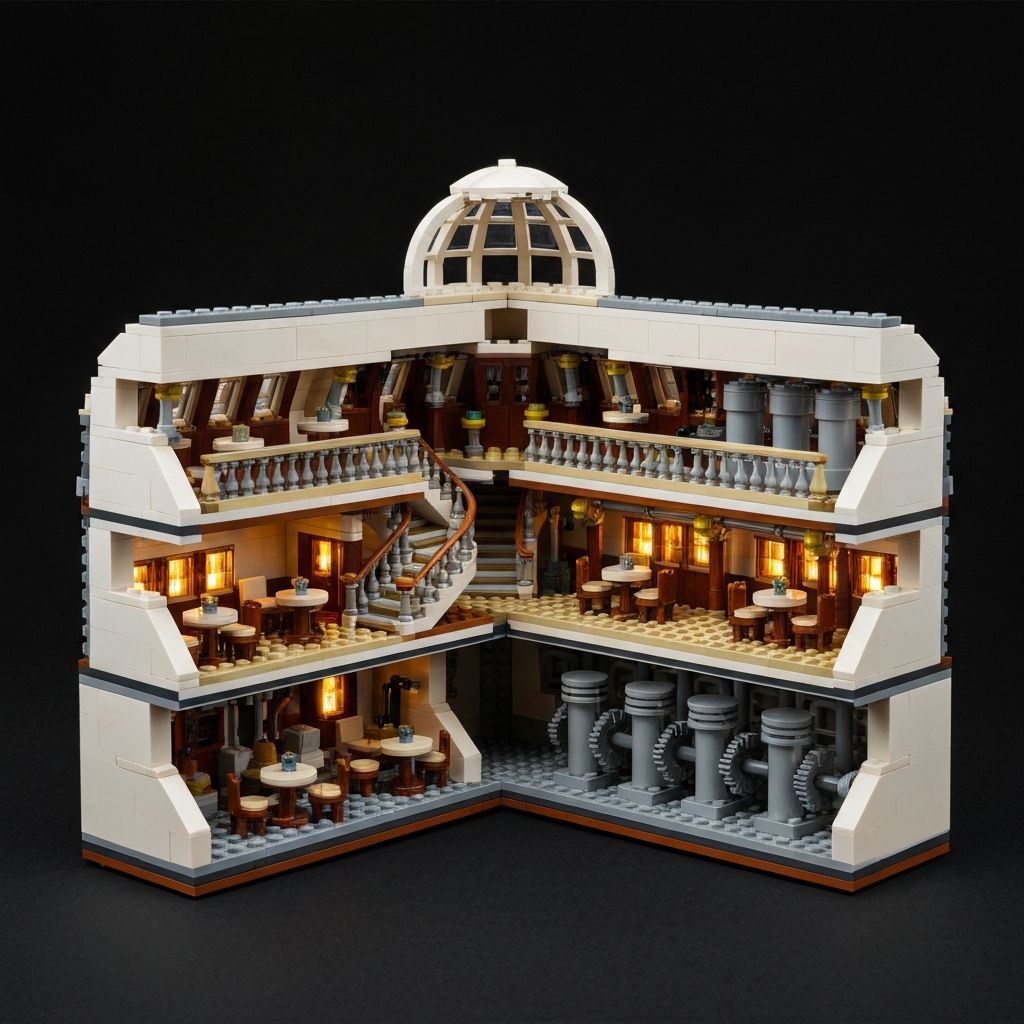
With the hull sections separated, five historical zones become visible simultaneously:
- Grand Staircase — ornate balustrades, dome skylight, and clock surround
- First-class dining saloon — tables, chairs, and printed tile floor panels
- Boiler rooms — cylindrical furnace stacks with coal-door details
- Engine room — triple-expansion piston shafts and crankshaft linkage
- Swimming pool — tiled surround and changing room partitions
Turn the external propellers manually. The internal piston engine linkage engages across the modular break points. The mechanical synchronization holds through the separation mechanism — functional engineering at 1:200 scale.
Display Requirements and Shelf Planning
Plan your display space before building. The 135cm length exceeds standard IKEA Kallax, Billy, and Detolf shelving widths. Dedicated solutions:
Recommended Setup
- Minimum shelf run: 140cm clear
- Depth: 25cm minimum for cradle width
- Height clearance: 30cm above cradle top
- Load rating: 5kg minimum for shelf surface
- Low-UV lighting to protect decal prints
Common Mistakes
- Placing on a standard 120cm IKEA shelf — hull overhangs
- Direct sunlight — yellows white hull panels within months
- Single central support — cradle requires all six points loaded
- Stacking items above — mast tips are fragile under pressure
- High-humidity rooms — cord rigging stretches and sags
LED Lighting Integration
The hollow hull design accommodates clean aftermarket LED integration without modifying any brick. Route 0.1mm micro-wires through standard Technic brick holes. Hide battery packs within the lower hull sections. Use contact boards between module break points to maintain the separation feature after lighting installation.
For a complete LED kit installation walkthrough, see the Hogwarts Express LED Lighting Kit installation guide — the micro-wire routing and expansion board techniques are identical across both models.
Historical Accuracy Details
Precision over approximation. Every exterior detail on the Titanic 10294 references original Harland and Wolff blueprints. Notable specifics:
Build Do's and Don'ts
Do
- +Sort all 9,090 pieces into hardware organizer trays before starting
- +Complete each instruction volume fully before beginning the next
- +Verify propeller shaft rotation before closing each hull module
- +Pre-route LED wires before installing the final deck plating
- +Use the included display cradle — all six support points matter
Don't
- –Force the module separation locking pins — unclip first, then pull
- –Display in direct sunlight — ABS white panels yellow quickly
- –Omit bulkhead alignment checks — errors compound across 9,000+ pieces
- –Leave cord rigging slack — tension is structural, not decorative
- –Build on a surface smaller than 150cm × 40cm
Every piece verified against the original 9,090-piece parts list.
Missing or broken components replaced at no charge on all orders.
The total billed at checkout is your final amount, inclusive of tax and tariff.
Ready to build the Titanic 10294 Creator Expert?
Order via WhatsApp for fastest response, stock confirmation, and shipping quotes.
View Product and OrderFrequently Asked Questions
How long does the Titanic 10294 Creator Expert take to build?+
Expect 40 to 60 hours of active building across three instruction volumes. Each volume corresponds to one modular hull section. Most collectors complete it over 3 to 6 weeks at a comfortable pace.
Can the completed model be separated into sections?+
Yes. The model divides into three sections via dual-axle Technic pin locks. Each section retains full structural integrity. The locking mechanism realigns precisely on reassembly.
What display space is required?+
The model is 135cm long, 22cm high, and 16cm wide. Plan for a clear shelf run of at least 140cm with a minimum depth of 25cm and load rating of 5kg.
Does the Titanic 10294 float?+
No. This is a precision display model with a heavy internal Technic frame. It is not watertight and is intended for shelf display only.
Is LED lighting integration possible without damaging the model?+
Yes. The hollow hull accommodates 0.1mm micro-wire routing through standard Technic brick holes. Battery packs fit within the lower hull sections. Contact boards between module breaks preserve the separation feature after lighting installation.