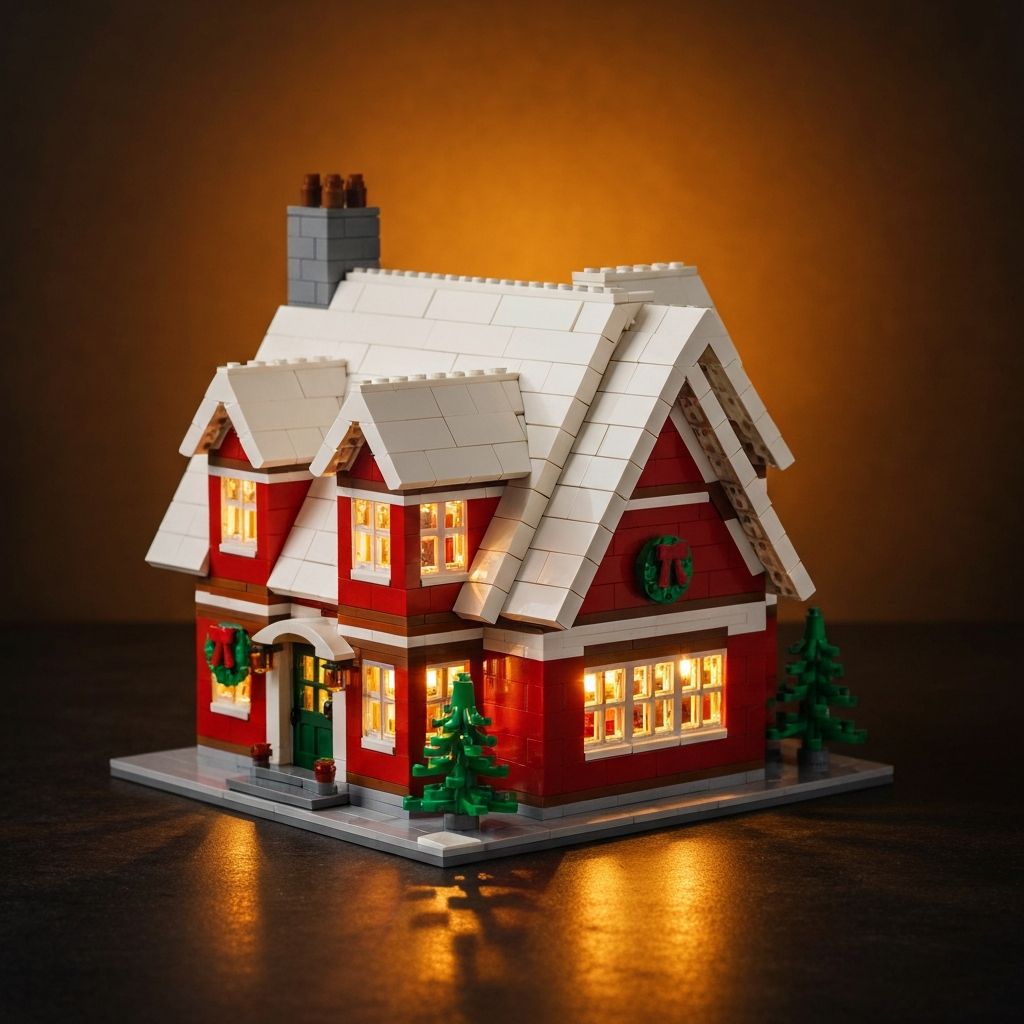
The PZX Christmas House is the premier winter building set — priced at $89.99. Build it to expand your holiday village. You get high-quality ABS plastic bricks with strict ±0.01 mm stud tolerances and complete compatibility with all major block brands. Adult collectors and families use this set to create stunning holiday displays with detailed interiors, snow-capped roofs, and festive accessories.
Prepare Your Holiday Building Station
Set up your workspace before you open the box. A proper station prevents missing pieces and speeds up the building process. Follow these three setup steps for a clean, efficient build.
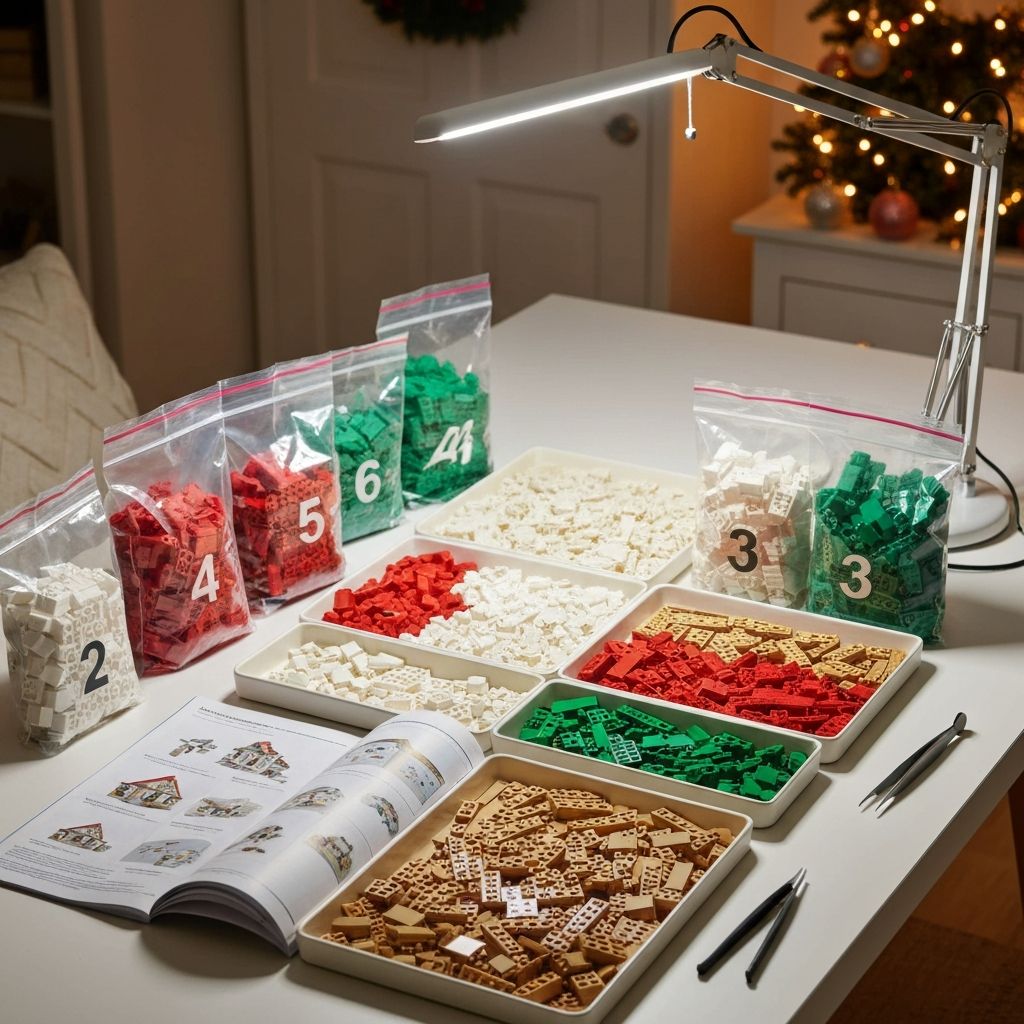
A well-organized workspace prevents lost pieces and makes assembly significantly faster
Organize Your Bricks
Use plastic sorting trays. Group bricks by color then by size. Open only one numbered bag at a time — finish that section completely before moving to the next bag.
Add Proper Lighting
Use a bright LED desk lamp. Winter sets feature many white pieces. Strong lighting helps you differentiate between standard bricks and modified plates, reducing eye strain.
Secure Your Table
Use a flat, stable surface. Keep the instruction manual open and flat. Add a raised border or tray lip around your table so small pieces do not roll off onto the floor.
Assemble the PZX Christmas House
The manual provides visual diagrams for every step. Follow the three phases below in order. Each phase builds on the last — do not skip ahead. For more complex MOC building guidance, see our dedicated guides.
Foundation and Snowy Base Layers
- Connect the large white baseplates and press all corners flush.
- Build foundation walls with alternating brick seams for maximum clutch power.
- Add snow-drift curved white slope elements around the perimeter.
- Expert Tip: Check stud placement against the manual at every row — a solid base supports the heavy roof structure later.
Detailed Interior Festive Decorations
- Assemble the fireplace using clear orange and red plates for fire effects.
- Connect chimney blocks and place printed tile elements on the interior walls.
- Install micro-build furniture and press small accessories in with a brick separator for leverage.
- Expert Tip: Test minifigure clearance inside every room before closing the walls — repositioning later is difficult.
Roof Structure and Holiday Lighting Integration
- Build the roof panels flat on your table using angled plates and hinge elements.
- Attach white slope bricks for the snow effect then lift and snap panels onto hinge brackets.
- Route LED wire through the designated gaps in the wall bricks near translucent windows.
- Expert Tip: Hide the battery box behind the house before closing the final rear wall panel for a clean finish.
Build Smarter: Do's and Don'ts
Do
- Open one numbered bag at a time and complete that section before starting the next.
- Use a brick separator for small accessories — it prevents broken fingernails and damaged studs.
- Test the roof opening mechanism before applying the final roof clips.
- Route LED wires through designated wall gaps before closing the rear panel.
Don't
- Force bricks that feel misaligned — recheck the step number in the manual.
- Leave batteries in the LED kit during long-term storage — battery acid damages ABS plastic.
- Place the display near direct sunlight or heating vents — extreme heat weakens clutch power.
- Skip the foundation alignment check — a crooked base makes the roof panels gap later.
Display Your Christmas Village
Proper display protects ABS plastic and dramatically increases the visual impact of your completed model. These techniques are used by top collectors across the US. For more ideas, browse our Building Sets for Adults category.
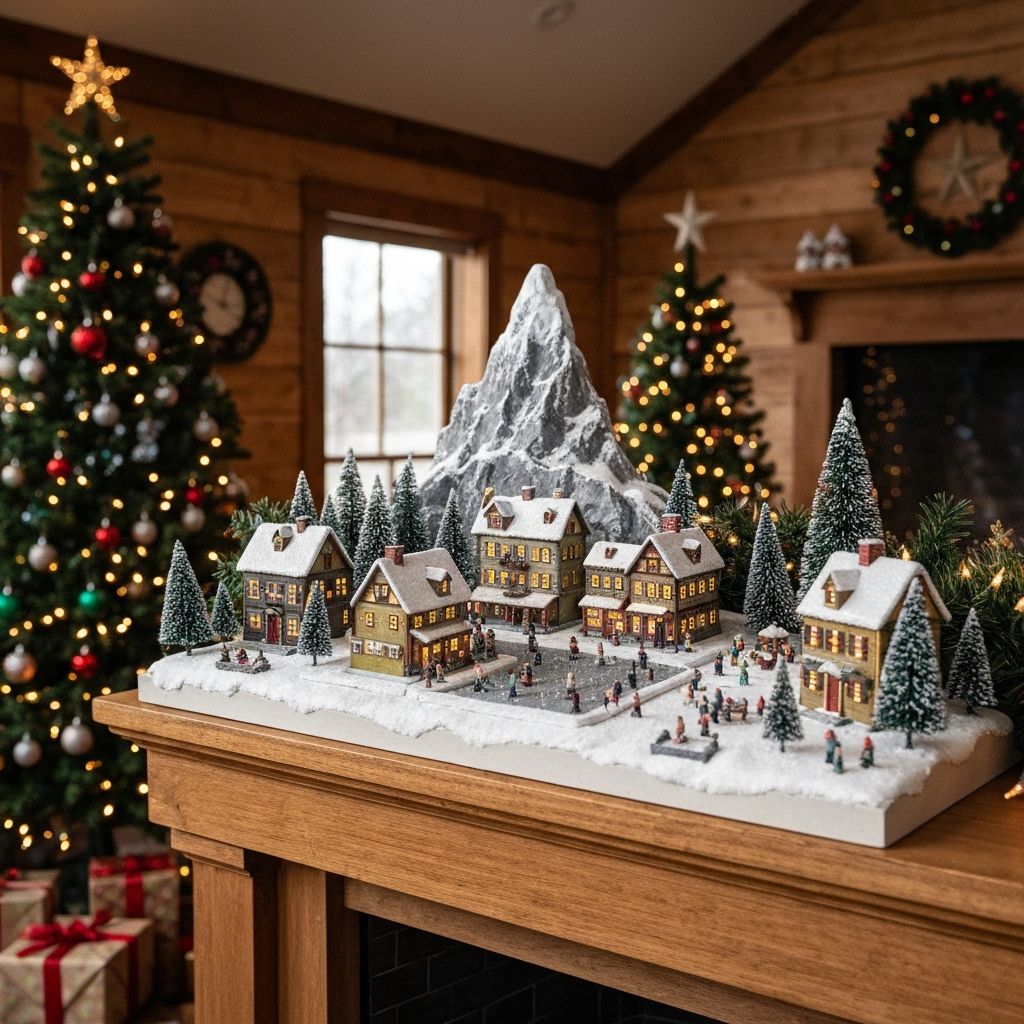
A winter village scene with LED street lights and cotton snow creates a stunning seasonal display
Use Acrylic Cases
A dust-proof acrylic case stops dust buildup and prevents UV fading. Your bricks will not yellow over seasons. Available in standard display sizes online.
Create a Village Layout
Place the house in the center. Add smaller builds around it and connect street plates. Add white cotton batting for extra snow texture and mini LED streetlights along the path.
Control the Environment
Keep the display away from direct sunlight and heating vents. Extreme temperature changes weaken clutch power and cause ABS discoloration over time.
Store Seasonal Models
After the holiday season, proper storage keeps your model in pristine condition for next year. Choose the option that suits your space.
Option 1: Store Fully Assembled
- Remove batteries from the LED light kit before storing.
- Place the entire model in a sealed plastic bin.
- Add silica gel packets to absorb moisture.
- Store in a cool, dry closet away from temperature extremes.
Option 2: Disassemble for Next Year
- Use a brick separator to remove pieces carefully.
- Sort pieces back into the original numbered zipper bags.
- Place bags and the instruction manual in the original box.
- Saves shelf space and lets you enjoy the build again next December.
Choose MOREBYBOURN for Holiday Sets
Buy your premium building blocks at MOREBYBOURN. Free US shipping. 30-day easy returns. Secure 256-bit SSL checkout. Our blocks meet the highest industry standards — ASTM F963 certified safe, ±0.01 mm stud tolerances, and backed by a missing pieces guarantee. We will replace any broken or missing piece FREE.
Free US Shipping
On all orders
30-Day Returns
No questions asked
Missing Piece Guarantee
FREE replacement