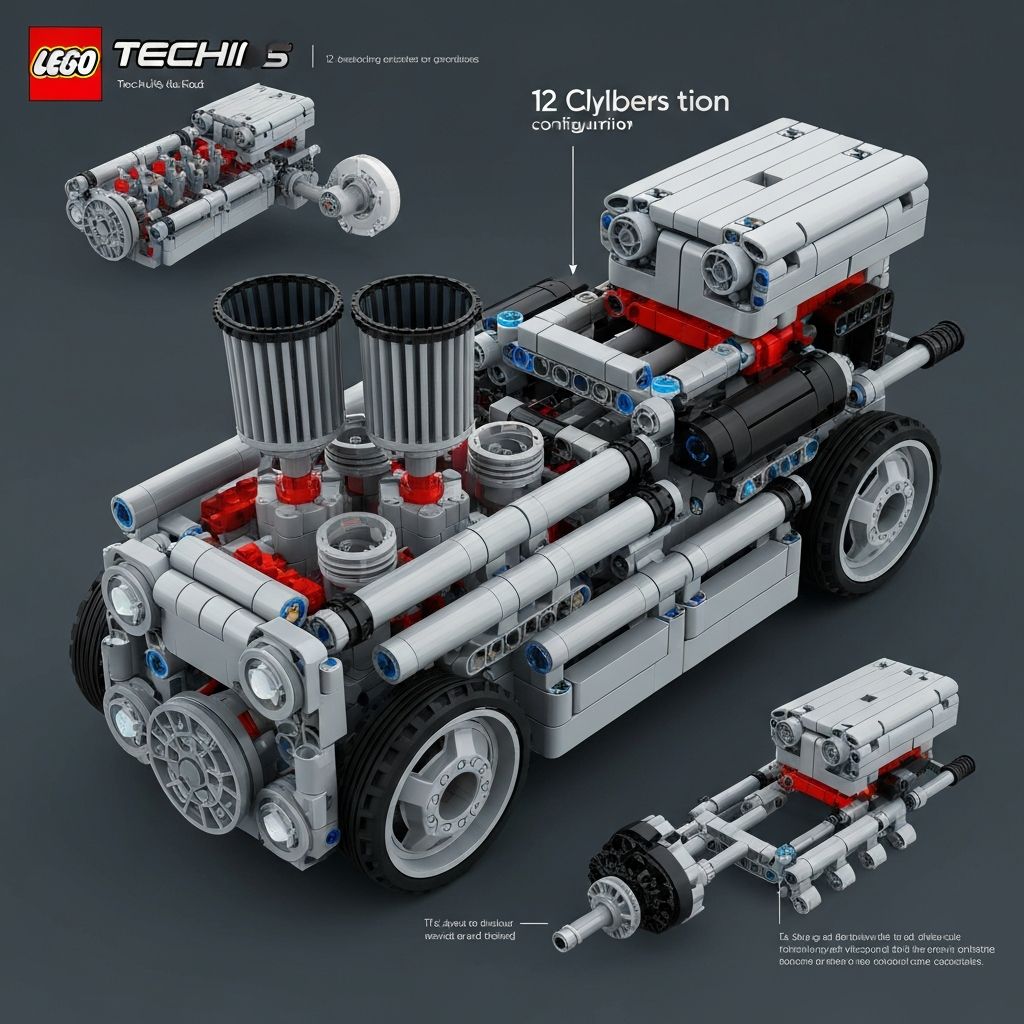
Build the Reobrix V12 Engine: A Complete Guide
Adults and families enjoy complex building experiences. The Reobrix V12 engine stands out as a top-tier project — thousands of precise pieces that form a working mechanical model with moving pistons and a turning crankshaft. This guide covers everything from workspace setup through final display.
Why Choose Premium LEGO Alternatives for Technical Builds
Technical builds demand exact tolerances. Inferior blocks cause gears to jam and pistons to bind. Premium alternative bricks provide excellent clutch power, perfect piece-fit, and high durability for moving mechanical parts — at a fraction of the cost of major brands.
Explore the full range of technical building block sets at MOREBYBOURN with premium ABS quality, 100% major-brand compatibility, and fast US shipping.
Pre-Build Preparation: Setting Up Your Workspace
Complex builds require clean, organized workspaces. Organization speeds up the build and reduces mistakes significantly. A large flat table with good lighting is non-negotiable for a model of this complexity.
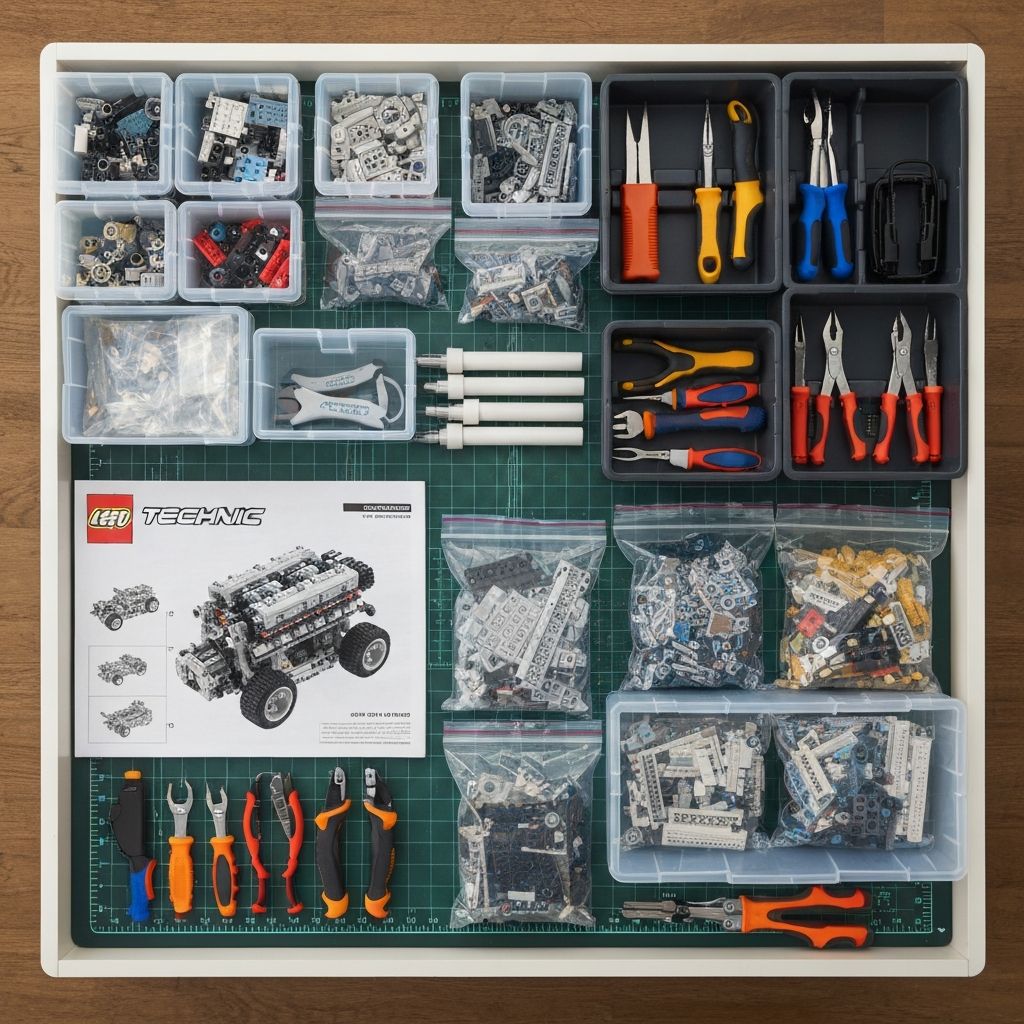
Clear & clean the table completely
Sort all bags by number before opening
Use plastic trays to separate axles, pins, and beams
Keep the instruction manual flat and well-lit
MOREBYBOURN Missing Pieces Guarantee — we replace FREE missing or broken pieces for all orders, so you can build with complete confidence.
Step-by-Step Guide to Assembling the Reobrix V12 Engine
The instruction manual divides the work into distinct phases. Follow the steps in order — technical sets do not allow shortcuts.
- 1.Gather the long axle pieces and slide connector pins into position
- 2.Attach the offset liftarms and verify the angles carefully
- 3.Build all 12 piston heads and connect the rods
- 4.Snap the connecting rods onto the crankshaft
- 5.Spin the crankshaft by hand to verify free movement
- 1.Build the lower engine block and insert the crankshaft assembly
- 2.Secure the main bearings and construct both cylinder banks
- 3.Slide the pistons into the cylinders and attach the cylinder heads
- 4.Build the overhead camshafts and connect the timing gears
- 1.Build and attach the exhaust manifolds to the cylinder heads
- 2.Construct and mount the intake manifold between the banks
- 3.Assemble the cooling fan and attach it to the front of the block
- 4.Build the display stand and mount the completed engine
Do's and Don'ts for a Smooth Build
Do
- Sort pieces by type before starting each phase
- Test crankshaft rotation after every piston is attached
- Use a bright work lamp to spot misaligned studs
- Split the build across multiple sessions to stay fresh
Don't
- Force-snap pieces that feel resistant
- Skip the rotation test between phases
- Wait until the end to troubleshoot friction issues
- Build in poor lighting — you will miss misaligned axles
Troubleshooting Common Mechanical Issues
Test the mechanisms after every major phase. Do not wait until the end — fixing a buried gear requires complete disassembly.
| Problem | Fix |
|---|---|
| Tight gears | Pull the gears slightly apart — do not force rotation |
| Bent axles | Replace the damaged axle immediately |
| Misaligned timing | Remove the timing chain and realign the gears from scratch |
| High friction | Check for incorrect pin placement in the bearing blocks |
How to Display and Maintain Your Mechanical Masterpiece
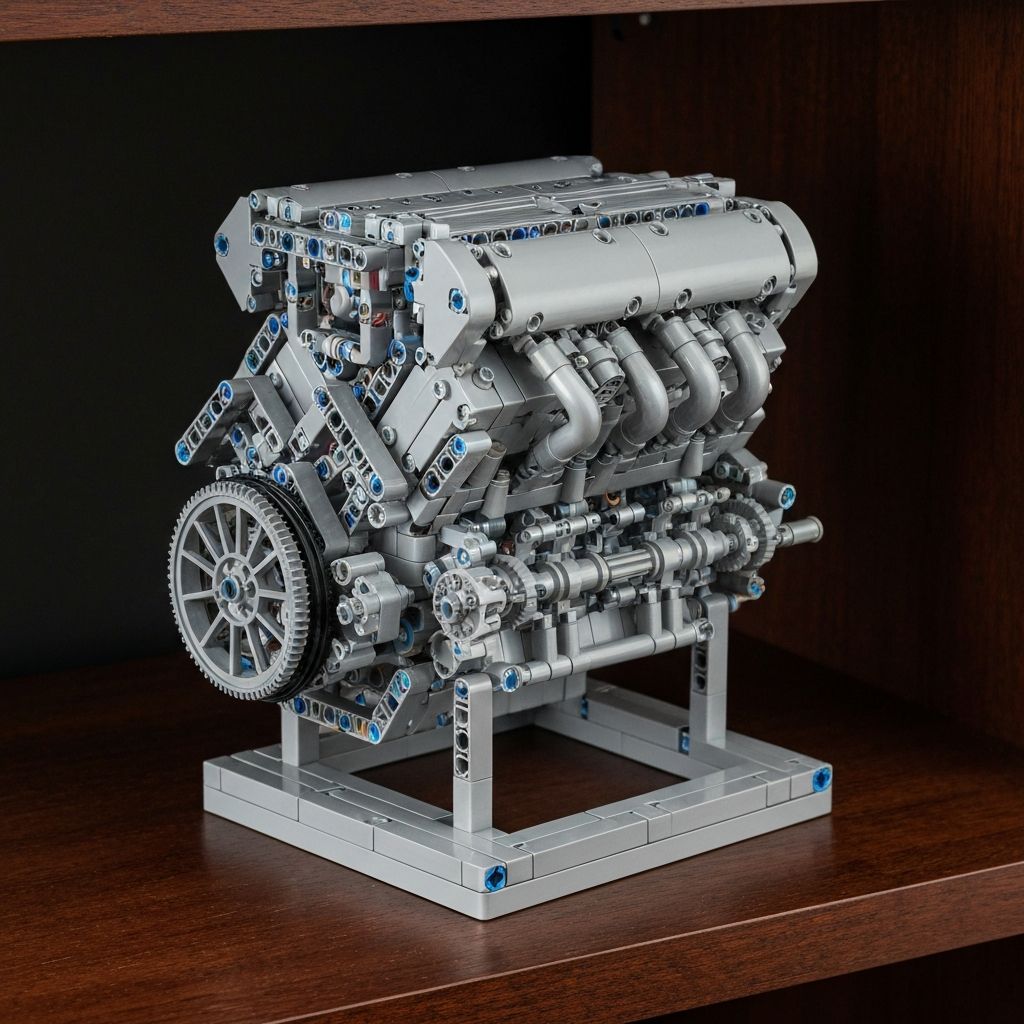
Placement
Display on a sturdy shelf away from direct sunlight. UV light degrades ABS plastic and fades colors over time.
Dusting
Use a soft makeup brush for exposed studs. Use canned air for deep gear crevices. Never use wet cloths near metal axles.
Display case
A clear acrylic case with LED backlighting showcases the mechanical detail and protects the model from dust buildup.
Why MOREBYBOURN is Your Go-To Source for Technical Building Blocks
100%
Brand Compatible
100+
Countries Shipped
256-bit
SSL Secure Checkout
30-Day
Return Policy
MOREBYBOURN supports the DIY culture and promotes STEM education through premium technical building sets. Explore all technical brick sets at MOREBYBOURN and find your next challenge.
Ready to Start Building?
Subscribe and get a 10% OFF code delivered straight to you. Join thousands of satisfied builders worldwide.
Start Shopping at MOREBYBOURNFrequently Asked Questions
MOREBYBOURN Editorial Team
Expert builders and collectors dedicated to helping you find, build, and display the best premium building block sets. Real Builders. Real Stories. Trusted by Creators Worldwide.